
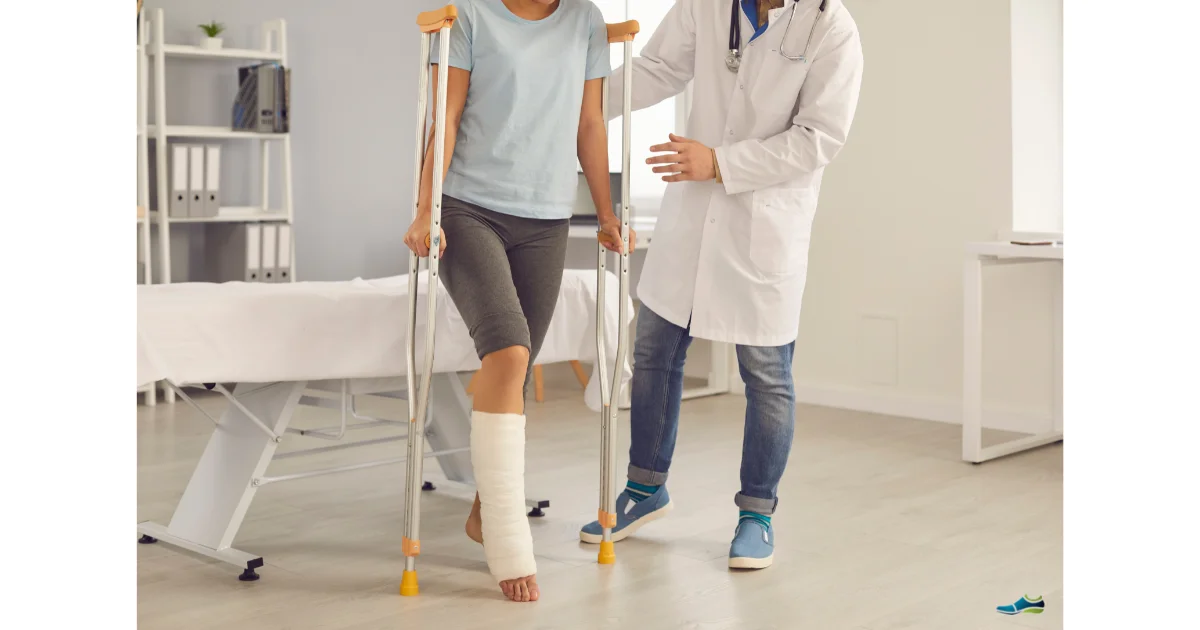
When you are dealing with advanced ankle arthritis, everyone talks about the pain. Almost nobody prepares you for the decisions that come with it — or what everyday life is actually like after a total ankle replacement. Finding a detailed recovery timeline written by somebody who has genuinely been through it isn’t easy.
I’ve been through two ankle replacements. For me, there was never really a discussion about ankle fusion because I knew I wanted to retain as much movement as possible. This is my unfiltered recovery timeline: what happened in hospital, what those first weeks at home were really like, the medical boot, the footwear transition, and the practical adaptations that genuinely made a difference.
Affiliate disclosure: This article contains affiliate links. If you buy something through one of these links, I may earn a small commission at no extra cost to you.
Medical disclaimer: This is my personal experience of two total ankle replacements, not medical advice. Recovery protocols vary, so always follow the instructions given by your own surgical and physiotherapy team.
The Long Road to a Diagnosis: Limbo Between Joint Conditions
To understand why I chose major surgery, you have to understand the years of confusion that came before it. For a long time, I was suffering from severe joint pain without really knowing why. I was placed under the long-term care of a Rheumatology department, where I went through several different diagnoses as my medical team tried to piece the puzzle together.
Because of my higher-than-usual CRP (C-Reactive Protein) blood test results and the symmetry of my affected joints, my consultants initially couldn’t completely rule out rheumatoid arthritis. Eventually, after all that medical limbo, I was diagnosed with severe osteoarthritis.
Living with that kind of prolonged, unexplained inflammation changes your perspective. By the time I finally sat down with my orthopaedic consultant, there was no hesitation. I knew how easily joint damage could steal my independence, and I was completely unyielding about preserving my physical mobility above all else.
Hospital Reality: The Wake-Up and The Cast Shock
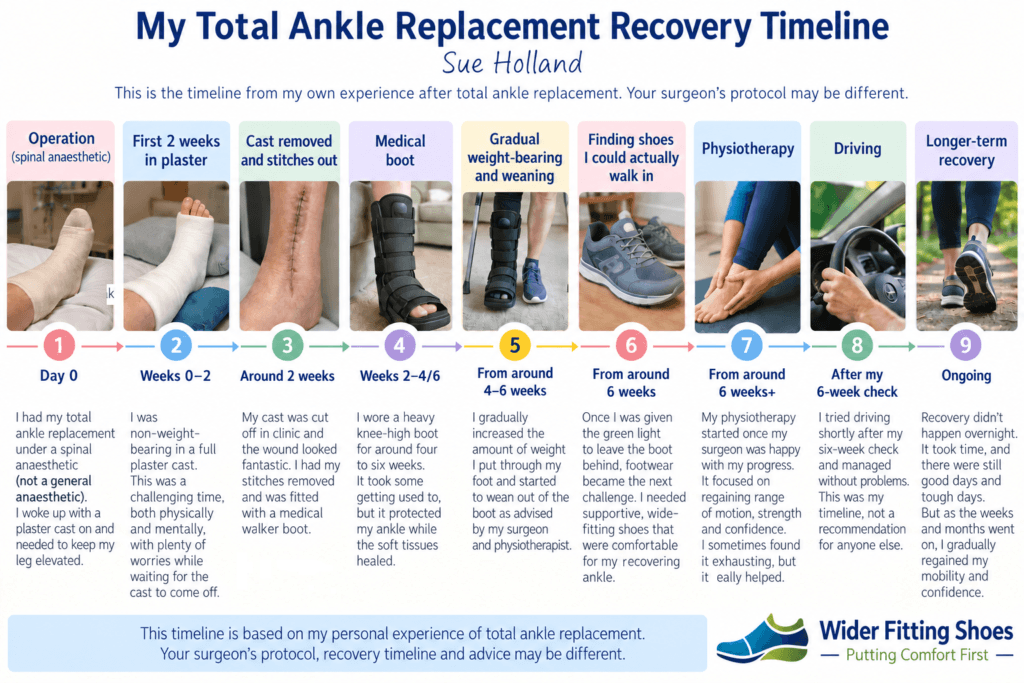
Before the operation, I was offered a choice of a general anaesthetic or a spinal anaesthetic with sedation. I’d previously had a spinal for one of my hip replacements, so I chose that option again. I don’t remember anything about the operation itself, and when I woke up I felt surprisingly clear-headed. That was simply my experience; your anaesthetist will discuss the options that are appropriate for you.
When I finally woke up from the anaesthetic, my operated leg felt incredibly heavy. Surprisingly, I wasn’t in an immense amount of sharp pain; instead, what I remember most was a deep, intense discomfort from how tight the post-op plaster cast felt around my swollen ankle.
After just a few hours, the ward nursing staff took one look at my discomfort levels and the swelling and made a swift decision: the cast needed renewing. As a patient, that was a genuinely scary moment. Before being wheeled down to the plaster room, my mind raced—I fully imagined that they were going to expose a raw, fresh surgical wound right in front of me.
Thankfully, that wasn’t the case at all. Underneath the hard outer shell lay a large, thick fabric dressing that the plaster technicians left completely intact and undisturbed. The relief the moment that new, professionally molded cast set was unbelievable—much, much better. The plaster room staff even cracked a joke about surgeons not being the best at plastering, which instantly cut through my anxiety!
Another part of going home was the medication I’d been prescribed to reduce the risk of blood clots while I was recovering. After my first ankle replacement, this meant giving myself a blood-thinning injection into my stomach each day for six weeks. By the time I had my second replacement, I was prescribed tablets instead, which I personally found much easier to deal with.
I also kept a simple written record of my medication and when I’d taken it. When you’re tired, uncomfortable and your normal routine has disappeared, it’s surprisingly easy to wonder whether you’ve already taken something. Writing it down saved me having to rely on my memory. Obviously, the medication and timing you are prescribed are something to follow exactly as instructed by your own medical team.
Pre-Discharge: The Physio Check and the Reality of Crutches
Before I was allowed to leave the hospital and head home, the ward physiotherapy team had to tick off a vital safety milestone: making sure I could safely navigate to the toilet. We practiced first using a standard walking frame, and then transitioned onto crutches.
At this early stage, I was strictly non-weight-bearing, meaning I wasn’t permitted to put even a fraction of pressure onto my operated foot. Because of this restriction, the crutches actually felt much easier and more maneuverable than the rigid walking frame. I could swing through safely without risking a stumble.
However, there was an unexpected hurdle further down the recovery line that I hadn’t really anticipated: the toll crutches would take on my upper body. After weeks of moving myself around using my arms, I developed deep aches and pains across my shoulders, wrists and upper limbs. If I were preparing for the operation again, the physical effort involved in using crutches is something I’d definitely think about beforehand.
Things I Hadn’t Considered About Using Crutches at Home
Getting around the hospital on crutches was one thing. Getting around my own house was another. I hadn’t appreciated how different floor surfaces would feel until I was relying completely on crutches. Carpet felt reasonably secure, but smooth kitchen flooring, wooden floors and awkward thresholds suddenly demanded much more concentration.
Clothing became surprisingly complicated too. I couldn’t get ordinary trousers over everything, so at one point I simply cut one leg off a pair of jogger bottoms. It wasn’t exactly high fashion, but it worked.
I also became very aware of things I’d barely noticed before — loose rugs, cables and anything else lying on the floor. When you’re balancing on crutches and aren’t allowed to put your operated foot down, ordinary household clutter suddenly looks rather different.
The Elevation Trap: Controlling Swelling Without Extra Strain
Once I crossed the threshold of my own front door, one of the main jobs was managing the post-surgery swelling. I’d been told to keep my leg elevated, but nobody really explained how to do that comfortably for hours at a time when your leg is heavy and encased in plaster.
For my very first total ankle replacement, I tried to save a bit of money by purchasing a cheap, inflatable leg wedge. It turned out to be a massive mistake. Because the inflatable wedge lacked a contoured, anatomically shaped cutout for the lower leg, the material was slick and flat. I spent the entire night under intense physical strain, constantly using my muscles just to prevent my heavy, plastered leg from sliding off the side.
While standard household pillows are a common alternative, I quickly found they require constant shifting and rearranging, which becomes incredibly exhausting when you are already fatigued. For my second ankle operation, I invested in a shaped memory-foam wedge with a channel cut into it to help keep my leg from sliding sideways. For me, that was vastly more comfortable because I wasn’t constantly trying to stop my plastered leg rolling off the wedge, and I could finally get some proper rest.
The Hygiene Strategy: Safe Bathing and Adapting to a Changing Body
Being unable to put weight through the operated leg affected things outside the house too. I remember going supermarket shopping with my husband and using one of the store wheelchairs for the first time. It was quite an eye-opener. Sitting at that height, I suddenly realised how much of the shelving and products I simply couldn’t see or reach without somebody helping me. It was something I’d never really appreciated until I experienced it for myself.
Monte, my Standard Poodle, presented another problem. Keeping an enthusiastic dog away from my operated leg became something of a military operation. I loved having him around while I was stuck at home, but I certainly didn’t want him launching himself onto the plaster cast.
Maintaining personal hygiene while managing a strict non-weight-bearing plaster cast is a major logistical challenge. For my first surgery, I purchased a specialized waterproof cast protector sleeve. While it kept the plaster dry, it highlighted a very personal hurdle that many chronic pain sufferers face: managing a changing body.
Before my joint problems took over, I’d always been slim. As my mobility became more limited over the years, I gained a significant amount of weight. That created a problem I hadn’t anticipated after surgery: the elasticated seal at the top of the cast protector felt incredibly tight and restrictive around my leg. It’s something I’d definitely bear in mind if you’re larger around the calf or thigh — the opening of the cast protector matters just as much as its length.
For my second replacement I bought a heavier blue rubber cast cover that was far less restrictive.
Because my shower is located above the bath, getting into the tub required careful coordination to protect both my new ankle and my previous hip replacement boundaries. We utilized an adjustable height stool placed securely inside the bath. With the invaluable help of my husband, I would carefully reverse onto the stool from the outside of the tub.
If I ever had lower-limb surgery again, I’d choose a height-adjustable stool with a rotating seat.
From there, he would lift both of my legs together as a single unit to ensure there was absolutely no bending or wide splitting at the hip joint, safely guiding my limbs over the edge before I lowered my feet into the base. It was a complex and exhausting maneuver, but that clean feeling afterward made every bit of the effort completely worth it.
The Two-Week Milestone: Conquering Cast Removal and Infection Anxiety
For exactly two weeks, my leg remained sealed inside that heavy post-op plaster cast. It sounds silly in hindsight, but I spent those fourteen days gripped by my absolute worst fear: that the medical team would find a deep surgical infection underneath the shell once it was cut away. Every time I felt a tiny itch or an unfamiliar twitch inside the plaster, my mind immediately feared the worst.
By the time I sat in the clinic waiting for the cast cutting to start, my anxiety had become so intense that I remember feeling genuinely faint.
The wave of relief when the staff cut the cast open and commented on how fantastic the wound looked was completely overwhelming. Next came the stitch removal. I sat gritting my teeth in anticipation of sharp pain, but it turned out to be nothing more than a mild, strange pulling sensation as the nurse carefully snipped and slipped the threads out. Once they were gone, the physical feeling of freedom was wonderful.
Before leaving the clinic, my surgeon said something that instantly made my stomach sink: “Remember, Sue, it’s early days yet.” I’d already got through what felt like a gruelling two-week mountain, so hearing that I was still only at the beginning felt surprisingly heavy. It became something of a recurring phrase too — he repeated “it’s early days” at several of my follow-up appointments.
The Medical Boot Transition: Fitting Snags and Comfort Shortcuts
On the day my plaster was removed, I moved into a removable plastic medical walker boot. The first one didn’t fit properly, though, and the clinic team weren’t happy with how it sat around my swollen foot and leg. I had to go back the following day once they’d found a larger size for me.
I distinctly remember commenting to the medical team that it felt as though I would never be able to physically put my heel down again. They gently reassured me that I would be able to do so soon. Though I was completely unconvinced at the time, they were right—within just a few days, my heel naturally found its place.
One thing I hadn’t anticipated was how difficult the boot itself could be to manage. Because of my previous hip replacements, bending far enough forward to reach all those stiff hook-and-loop straps was hard work. Getting the thing properly fastened every day became a job in itself.
There was another problem inside the boot. The hospital-provided tubular compression bandage constantly slipped, moved around and creased up, causing painful pressure points. For a while, I even used a soft silk scarf around my lower leg as a barrier between my skin and the rough boot lining. It wasn’t a long-term solution, but it helped while I looked for something better.
Eventually I found knee-high socks with soft diabetic-style tops, which were much more comfortable around my swollen calf. I wore them underneath the boot lining and, for me, they made an enormous difference to the comfort of wearing the boot. They were worth every penny.
Sleeping in the Boot and the Light at the End of the Tunnel
For the next two to three weeks, I still had a protective dressing over the wound and had been told to sleep with the heavy, knee-high boot fully fastened. Getting a restful night’s sleep with a bulky plastic structure on your leg isn’t easy. When I was awake and resting safely on the sofa, I sometimes unfastened it and took it off for just a few minutes to give my leg a breather, making sure that Monte was kept out of the lounge.
The first couple of weeks after surgery had been the hardest part for me. By this stage, though, I was beginning to feel that I’d got through the worst of the immediate post-operative upheaval. I still had a long recovery ahead, but compared with those first days in plaster, things were starting to feel more manageable.
The Weaning Phase: Transitioning Out of the Boot
In my case, I wore the medical boot for around four to six weeks. Coming out of it wasn’t an overnight event either. I gradually started putting more weight through the operated leg while still using my crutches, following the instructions I’d been given by my surgical and physiotherapy team.
Even after the boot finally went, I continued using the crutches for a while. It felt strange learning to trust that ankle again after weeks of protecting it, and the crutches gave me some support while I gradually got back to normal walking.
Once I was given the green light to leave the boot behind, footwear became the next problem. I’ve written a separate guide about what to wear when you come out of a medical boot after ankle surgery, but this is what happened to me after my first ankle replacement.
Finding Shoes I Could Actually Walk In
Coming out of the medical boot didn’t mean I could simply put my old shoes back on and carry on as normal. After my first ankle replacement, I bought a pair of very soft Skechers because I assumed cushioning and comfort were exactly what my recovering ankle needed.
At my next appointment, my surgeon wasn’t impressed with my choice. He wanted me in something more substantial and suggested a rocker-soled shoe. I eventually found the H-Lana rocker shoes, which gave me the combination of room and structure I was looking for at that stage of my recovery.
It was an important lesson for me: the shoe that feels softest when you first put it on isn’t necessarily the shoe your surgical team wants you walking in after an ankle replacement. After my second replacement, I didn’t make the same mistake again.
My Follow-Up Appointments and X-Rays
One thing that surprised me was how closely I was monitored by the surgical team afterwards. At each of my hospital follow-up appointments, fresh X-rays were taken so the surgeon could check the replacement. My own follow-up schedule included a two-week check, a six-week check, another appointment six weeks later, followed by three-month and six-month reviews.
Those appointments weren’t just about the X-rays. They also gave me the opportunity to discuss things such as footwear and insoles with my surgeon as I moved through the different stages of recovery. It was reassuring to have those regular opportunities to ask questions as my needs changed.
The Physiotherapy Stage
Once I was completely out of the medical boot, my physiotherapy rehabilitation began and continued for the next few months. I’d been apprehensive about this stage because I imagined somebody physically forcing my new ankle to move, but that wasn’t my experience at all. My physiotherapy centred around exercises that I could gradually work on myself.
Watching movement slowly return to the ankle was genuinely exciting, although I’d be lying if I said I enjoyed every minute of the rehabilitation. Some days the sheer effort of it made me want to crawl under a stone. Recovery might look wonderfully progressive when it’s written as a neat timeline, but living through it day after day can feel very different.
Returning to the Driver’s Seat
Getting back behind the wheel was another big milestone for me. I remember dreading that first drive because I wasn’t sure how my ankle would react when I pressed the pedals, particularly if I suddenly needed to brake hard.
I first tried driving again shortly after my six-week hospital check-up, and thankfully I managed without any problems. That was my own recovery timeline, though, rather than a recommendation for when somebody else should start driving.
There isn’t one fixed date when everybody can start driving again after ankle replacement. GOV.UK says drivers are responsible for remaining in control of the vehicle and should establish with their doctor when it is safe to drive after surgery. My hospital guidance also required being able to perform an emergency stop. You should also make sure that your motor insurance remains valid before returning to driving.
Facing My Second Ankle Replacement
There’s one thing I’ve noticed when looking back at both of my ankle replacements. My memories of the first operation are incredibly sharp, yet the second is strangely hazy. I think a lot of that was simply because I knew what was coming the second time around.
Before the first operation, almost everything frightened me because I had no idea what recovery was actually going to be like. By the second, I’d already dealt with the plaster cast, the crutches, the medical boot, the swelling, the physio and all those awkward little everyday problems that nobody really talks about. None of it was particularly mysterious any more.
That doesn’t mean somebody else’s recovery will be the same as mine, or that there won’t be difficult days. But having been through two total ankle replacements, I know how valuable it would have been to read an ordinary patient’s account before my first one. That’s why I’ve written this timeline — not to tell you how your recovery will go, but to show you honestly how mine did.
About Sue Holland
Sue writes WiderFittingShoes.com from first-hand experience of finding footwear for wide and difficult-to-fit feet. After two hip replacements, two ankle replacements and years of dealing with arthritis, swelling and feet that don’t always behave the same from one day to the next, she shares the practical things she’s learned about shoe fit, width and comfort.
Further reading and useful resources
For medical guidance on ankle replacement recovery and returning to driving, these are useful UK sources. Your own surgical team’s advice should always take priority because recovery protocols vary.